Field Embedding
What is Field Embedding?
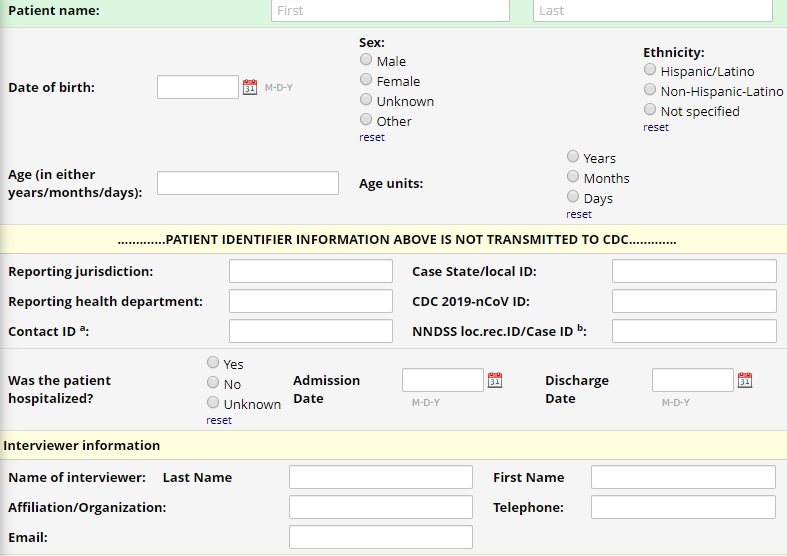
The 'Field Embedding' feature in REDCap is the ultimate way to customize your surveys and data collection instruments to make them look exactly how you want. Field Embedding allows you to reposition field elements on a survey page or data entry form so that they get embedded in a new location on that same page. Embedding fields gives you greater control over the look and feel of your instrument. For example, you may place fields in a grid/table for a more compact user-friendly page, or you can position some fields close together in a group if they are related. See the screenshots below for examples of what field embedding looks like and how to utilize this powerful feature.
How to embed a field
The steps below illustrate the basic template for embedding a field.
- First, create the field. The field must exist first before it can be embedded elsewhere. Note: You do not necessarily have to add a Field Label to the field because that label will ultimately be hidden when the field gets relocated elsewhere on the page. This is true for a field's Field Note and '*must provide value' text (if required) as well, in which none of those text labels will get moved with a field when it is embedded.
- Place the REDCap variable name of the field you wish to embed inside braces/curly brackets - e.g., {date_of_birth} - and place it in the Field Label, Field Note, Section Header, or Choice Label of another field on that same instrument. Field embedding will not work across instruments but only on the current instrument/survey being viewed. If on a multi-page survey, then the embedded field must be on the same survey page as its host field. We encourage you to utilize the rich text editor heavily to get the field to look exactly how you want.
- Test it. Create a test record, and go view the instrument to check that the embedded field looks like you wanted. If not, keep tweaking it using the rich text editor. The 'Preview Instrument' button in the Online Designer may also be used to view how the instrument might look when embedding fields, but it is a much more limited and less accurate representation than when viewing the instrument itself for a test record.
Recommendations and limitations for usage
- For field embedding to work, you must place the variable name in braces/curly brackets { } - e.g., {date_of_birth}. This is different from piping, which uses square brackets [ ].
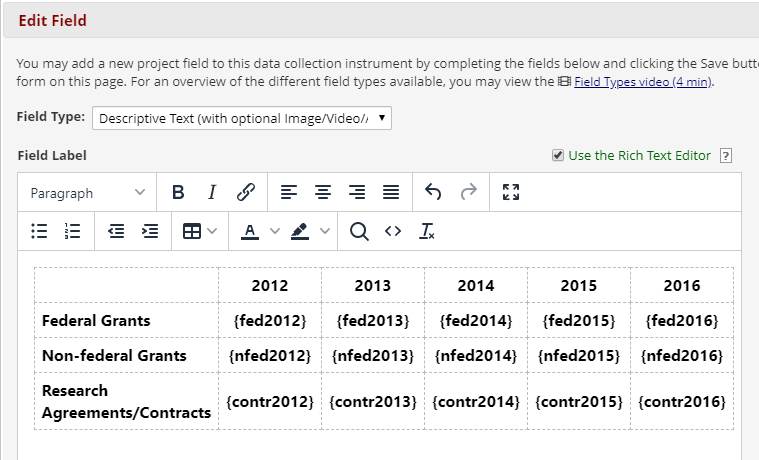
- The most common place to embed a field is in the Field Label of a Descriptive field. Descriptive fields are merely blocks of text, so they are excellent for using the rich text editor to build tables or complex structures for placing your text and embedded fields.
- Adding the field icons: The usual icons pertaining to a field's Data History, Field Comments, and (if enabled) Missing Data Codes can be displayed on a data entry form (but not on a survey) next to the embedded field's new location by appending
:iconsto the variable name inside the braces/curly brackets - e.g., {last_name:icons}. The icons do not appear by default but only when the ':icons' signifier is attached. - Field embedding will only relocate the actual input element (e.g., the text box, radio buttons). It will not relocate the field label or field note, although it *will* relocate the choice label for radio/checkbox fields so that the radio/checkbox choices maintain their labels. Additionally, the original location of the field being embedded will be completely hidden after it is relocated, which means that the field's true field label, field note, etc. will never actually be seen on the survey/instrument. It is recommended to add a Field Label even if the field is being embedded because the label will still be needed when viewing a report.
- Do not nest embedded fields: A field cannot be embedded inside itself (i.e., in its own Field Label), and a field cannot be embedded in another field's Field Label or Field Note if that field is also embedded elsewhere. If these are done, an error message will appear when viewing the instrument in most cases. A field *can* be embedded into a Choice Label of a multiple choice field (with the exception of drop-down fields) that is also embedded elsewhere; this would be considered compound embedding.
- Fields may be embedded only in the following places: the Field Label, Field Note, Section Header, or Choice Label of another field on the same instrument, or if on a multi-page survey, the embedded field must be on the same survey page as its host field. Note: Fields cannot be embedded into drop-down labels, survey instructions, survey acknowledgment text, survey queue text, or into any outgoing emails/invitations/alerts.
- Field embedding does not work in the REDCap Mobile App. If a project with embedded fields is loaded into the mobile app, it will not look how it does on a REDCap survey/instrument webpage.
- Branching logic: If a field is embedded and has branching logic, the branching logic for that field will operate as it normally does, in which the embedded field will be hidden when its branching logic evaluates to FALSE. Additionally, if the host field contains branching logic that causes it to be hidden, then all fields embedded within it will be hidden as well (since they are considered part of the host field). When the host field is being hidden, if any of the embedded fields inside the host field have a value, then the user viewing the data entry form (surveys are excluded) will be given the 'Erase current value of the field?' prompt for each embedded field. In this case, if the user responds to the prompt with 'Cancel' in regard to erasing the value of *any* of the embedded fields, then the host field will not be hidden but will remain visible.
- NOTE: The Record ID field (the first field in the project) cannot be embedded because it is a special field.
- It is possible to embed a Descriptive field inside another field, even though descriptive fields do not have an actual input element for saving data. Embedding a descriptive field would merely relocate the field's label to the new location where it is embedded. This is typically only useful if the descriptive field has branching logic, in which you could use branching logic to make the descriptive field's text appear conditionally in a specific place on the page.
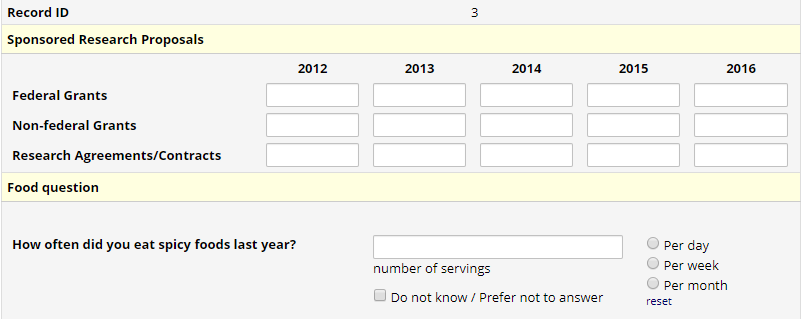
Example of setting up an embedded field in the Online Designer using a table in a Descriptive field's Field Label
EXAMPLE 1
EXAMPLE 2